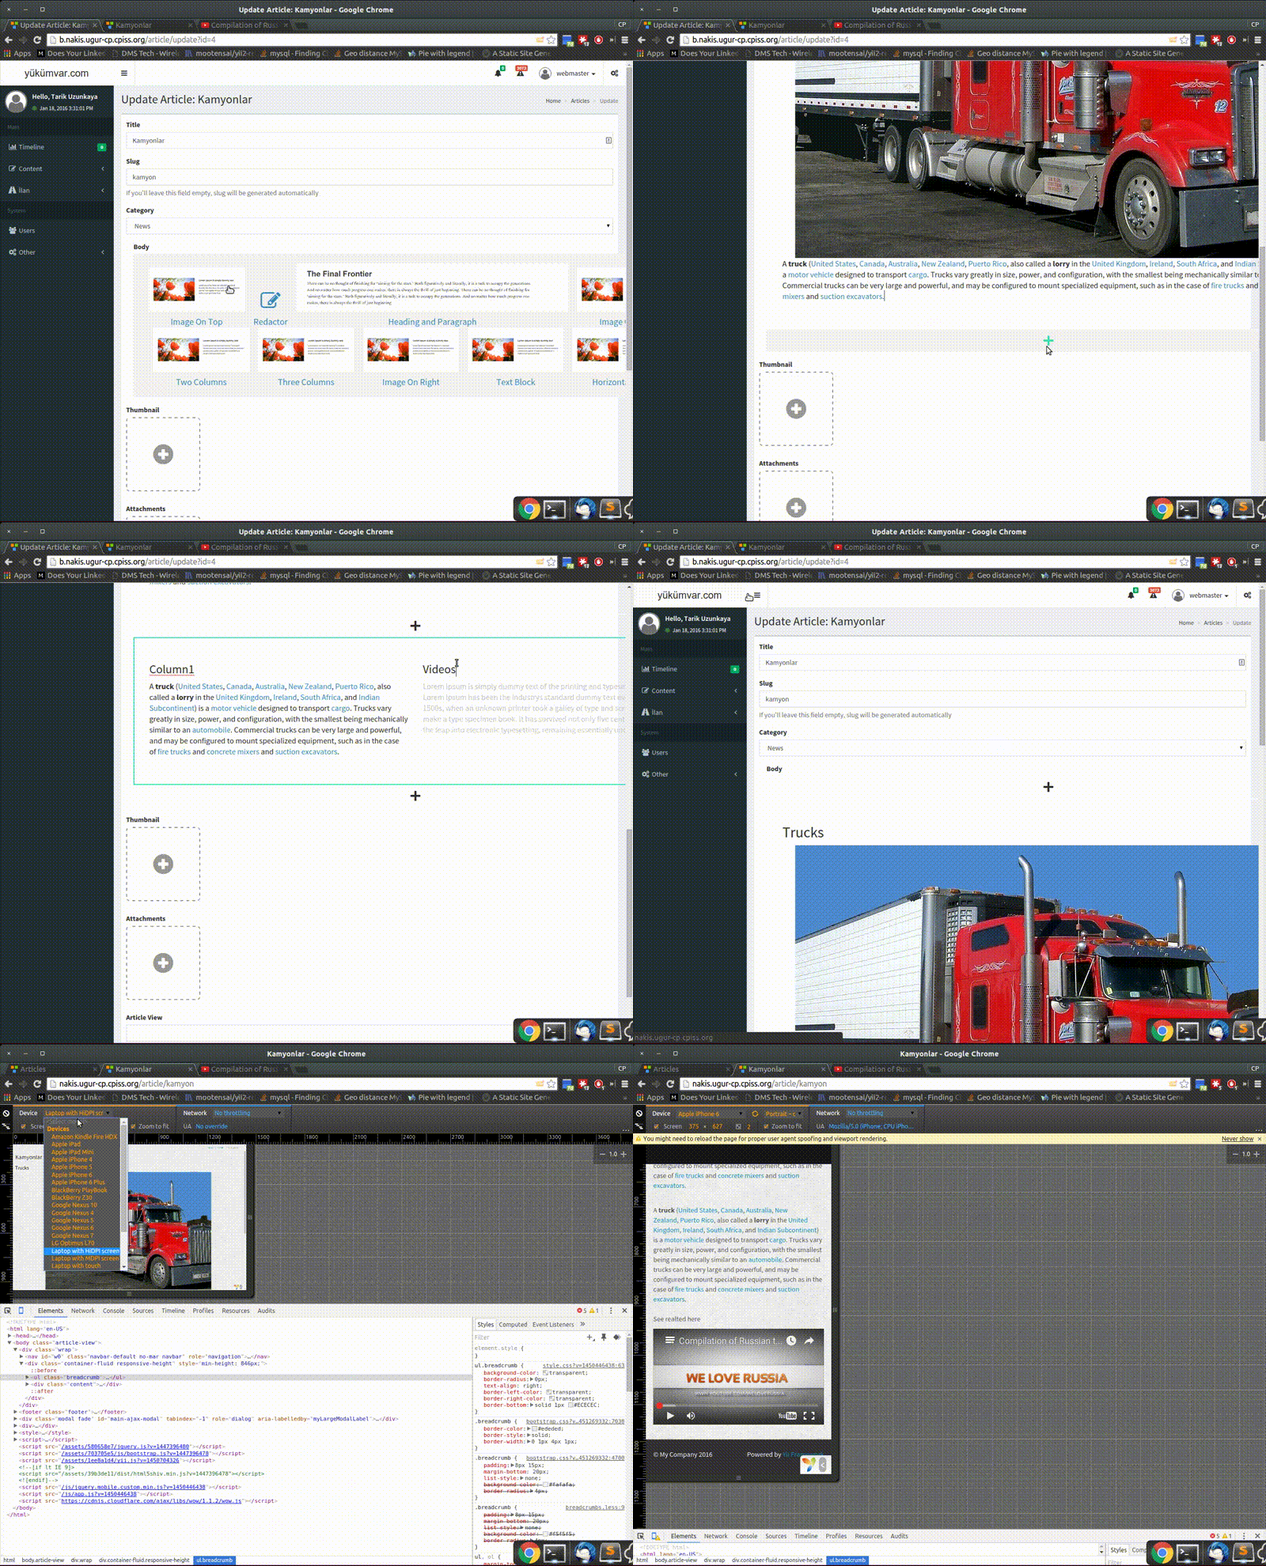
udokmeci/yii2-kont-trevor Yii2 Sir Trevor + Mustache Custom Block Generator
sirtrevorcontentbuilderyii2-kont-trevor
yii2 optimized content builder upon Sir Trevor wysiwyg custom components with Mustache, jQuery Cropper and others.

Installation
The preferred way to install this extension is through composer.
Either run
php composer.phar require --prefer-dist udokmeci/yii2-kont-trevor "*"or add
"udokmeci/yii2-kont-trevor": "*"to the require section of your composer.json file.
Configuration
Once the extension is installed, simply use it in your code by :
...
 'components'=>[
 ...
        'kontTrevor' => [
            'class' => 'udokmeci\yii2kt\KontTrevor',
            'on init'=> function($e){
                $e->sender->addProviders(require_once Yii::getAlias('@vendor/udokmeci//yii2-kont-trevor/src/udokmeci/yii2kt/config/base-blocks.php'));
            }
        ],
    ...
Form
On editor depends on perminder-klair/yii2-sir-trevor-js however you can add you custom blocks. Also register CustomSirTrevorAsset to view.
<?php \udokmeci\yii2kt\assets\CustomSirTrevorAsset::register($this); ?>
<?= $form->field($model, 'body')->widget(\kato\sirtrevorjs\SirTrevor::classname(),[
        'debug'=>true,
        'imageUploadUrl'=>Url::to(['/site/st-upload']),
        'blockTypes' => [ 'Imagetop','Redactor', "Headex", 'Imageleft', 'Twocolumns', 'Threecolumns','Imageright','Textblock','Hr'],
  ]); ?>
Rendering
Rendering basically depends on mustache.php same template from blocks will be used however creating other blocks are possible. TODO: Block Interface
$convertor = new \udokmeci\yii2kt\Parser();
echo $convertor->toHtml($this->body);
Block Templating
On base-blocks.php there are defined templates for example Imagetop
   [
        'title'=>"Image On Top",
        'type'=>"Imagetop",
        'image'=>'/img/sir-trevor/imageLeft.png',
        'templateObject'=>[
            'img_1'=>[
                'url'=>'https://s3-eu-west-1.amazonaws.com/yukumvar/upload/0aNk9D.',
            ],
            'h2_1'=>'Title Goes Here',
            'subtext_1'=>'Lorem Ipsum is simply dummy text of the printing and typesetting industry. Lorem Ipsum has been the industrys standard dummy text ever since the 1500s, when an unknown printer took a galley of type and scrambled it to make a type specimen book. It has survived not only five centuries, but also the leap into electronic typesetting, remaining essentially unchanged.',
        ],
        'template'=><<<MST
<div class="row">
  <div class="col-md-12">
    <h2 class="st-required header1" data-st-part="data" data-role="editable-subblock" data-key="h2_1" >{{h2_1}}</h2>
  </div>
  <div class="col-md-12">
    <img class="img-responsive center-block" src="{{img_1.url}}"  alt="{{h2_1}}" title="{{h2_1}}" data-width="{{img_1.width}}" data-height='{{img_1.height}}' width="{{img_1.width}}" height='{{img_1.height}}'data-id="{{img_1.id}}" data-st-part="data" data-role="editable-image" data-max-width="1076" data-key="img_1"/>
  </div>
  <div class="col-md-12">
    <p class="st-required" data-st-part="data" data-role="editable-subblock"  data-key="subtext_1" >{{{subtext_1}}}</p>
  </div>
</div>
MST
    ],
title
Anything to write on adding menu.
type
type to pass sir-trevor. Did not checked why but ucfirst non spaced type can be found only.
image
Any image to show on adding menu. If image is not added it tries its best to generate images from html markup but sucks now.
templateObject
Dummy data to work as placeholder on added block.
template
A Mustache template rendered on JS or PHP. So one template is used to pass to editor and on render. The new block will render automatically.
data-st-part="data"
*Required to proccessed by plugin.
data-role="editable-subblock"
Works as text holder. On h* tags it pastes only text content. On other block clears formatting and keeps bold and italic only. Appends HTML on pastes.
data-role="editable-image"
Makes image placeholder and puts controllers above it. You can select upload image, crop it and replace by front end.
image data
src, width, height, id is recorded. if image has id when uploading it sends the old id, if you like to replace image.
data-max-width="1076"
Before uploading reduces if the witdh of image is higher than that width in pixel units. Global setting is 1200px
Images can be combined with other editable-subblock data for alt and title attributes for SEO purposes.
The Current Situation?
There are too many dependencies since I have not find any time to make them combined. It may be used in admin panels only for now but you can serve this one to logged in users as well. You can change classes to fit any other framework.
Statistics
Downloads
GitHub Stars
GitHub Forks
Releases
- 1.0.105 April 2021
Stats
17 github stars & 8 github forks0 downloads in the last day
0 downloads in the last 30 days
253 total downloads
Comments